
that's what what you're asking yourself, isn't it?? LOL! Afterall... my current kiln (a Jen Ken AF3P 11/4.5 with 2" Flip Door) is only 8 months old or so... brand spanking new, for all practical purposes & it's plenty big for normal beadmaking use. Usually...when you make beads, after a bead has been in the kiln for a little bit, you can move it over to make room for more, even pile them on top of eachother & they'll be perfectly fine. I've done this many times when I'm running out of room...but I have a fun little story to tell you... (LOL!)
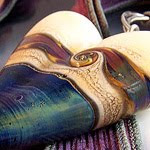
As you already know, I'm having an affair w/ Opal Yellow & Rubino glass & now that my pieces are getting larger, running out of room happens often. The first time I made a dozen or so handles for my serving pieces & things were getting tight in the kiln, I took the beads I had made earlier...the ones that had been in the kiln for hours...& moved them over into a pile to make room for more (I was on a roll). After going through the normal annealing cycle & the beads were at room temperature & ready to come out to be fondled by me, :o) I opened up my kiln & picked up the first mandrel & along came about 8 more mandrels w/ a really big clump of beads attached. UGH!!!! I was able to get the majority of them unstuck, but they had missing glass or extra glass from the neighbor's missing glass, LOL! OMG, it made me sick. All that work... all that EXPENSIVE glass!!! UGH. I didn't understand it, I've stacked beads many times before no problem, what was different w/ these??? So, I headed out to Lampworks Etc to see if I could find some answers. I posted a "what the heck?" thread, mentioned what glass I used & the answer was immediate... RUBINO. It was the Rubino, which stays sticky, no matter how long it's been in the kiln. So there you go. I didn't toss the beads, I did a search on LE about fixing beads & found that it was possible to put them in a cold kiln & slowly bring it up to 1040 degrees, let it soak for at least 30 more minutes at that temp & then bring them out, one at a time, of course, & slowly introduce them back into the flame, reheating the whole bead & fixing the places that needed fixin'. This can be done w/ cracked beads, too. Many people said that they didn't ever bother trying this because they lose more than they save, but I was able to save every single bead. Yes!!
So...I guess I can say that whole experience was a VERY useful one, I learned some valuable information... but I also learned that my kiln is too small for what I'm doing. Even though I don't stack them anymore if they have Rubino (which MOST do, of course, LOL!), sometimes when I'm putting a bead into the kiln, I accidently touch it to its neighbor because there is only so much space & they stick together, ugh! So, although I can fix them later, it's frustrating & time consuming.
So...(I like that word!) I ordered a Glass Hive Annealer & I can't wait to get it! Its interior is 18" wide x 4 1/2" high x 6" deep... my Jen Ken is an 11" wide interior hexagon x 4 1/2" tall, but the door is only 2" tall! This new one has TWO 10" wide by 4" high doors!!!! This is going to be fantastic! There have been times where 2" is barely big enough to get the bead in w/out scraping the sides! LOL. I'm going to come up w/ some sort of back wall (a piece of steel w/ a grid of holes) so I can easily stack beads as I go... who knows how quickly 18" width will fill up?? :o)
Anyway...my friend Mallory is buying my Jen Ken...she had been bugging me to upgrade so she could buy it from me, LOL, so she got her way. :o)
Thursday, January 3, 2008
Subscribe to:
Post Comments (Atom)


0 MUCH APPRECIATED COMMENTS:
Post a Comment
Thank you for commenting. I enjoy hearing from you!