
(click on image for detailed view)

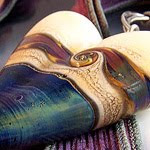
I've been electroforming ALOT these past several months... mainly acorns & birdhouses. It's kind of tough, though, because you can really only have maybe 3 pieces in the "bath" at one time... you have to adjust the electric current accordingly (current x2 for 2 pieces, x3 for 3 pieces & so on) & I can only fit so many in my small Pyrex beaker that came w/ my kit at one time. They take probably 8-12 hours each, too. So lately, I've had a long line-up of acorns ready & waiting for their turn.
A few months ago I started trying to figure out how I could possibly expand the setup so I could do more pieces, knowing that if I got a larger container & had more pieces in there at one time, I would have to do some serious adjusting to the current to try to figure out what would work out best w/ however many pieces I was doing. Then I thought that maybe I would just have to have more than one set-up w/ another few rectifiers (power source), which would be a nice chunk of change. Don't think so. My next thought was that maybe I could put some sort of splitter on the lead wires so I could split the current between 2 beakers... then it occurred to me that the thick copper wire that each of the pieces were suspended from could just be expanded over multiple containers & the current would be the same for each container, not split between them... so I wouldn't have to multiply the current times every single piece that was being suspended from that wire, just times each piece that were suspended in each container.
I know... I lost you, didn't I?? :o)
Anyway... it made sense to me, so I tried it, adding a second round glass container & it worked! I was able to do 3 pieces in each one at one time, no problem!! That was awesome!! But, I didn't like the round containers... they felt small & restrictive. I read a bit & found out that I could use acid resistant plastic containers & was pointed to a restaurant supply place. I found some plastic steam pans that would be just perfect... (Cambro Camwear® Food Pan, 1/6 Size, 6" Deep, Clear #CAM66CW135)
Here you go... I set this up this weekend & had 12 acorns going at once... it was great! That went too well :o)... now I need to get more acorns & birdhouses ready to go...


5 MUCH APPRECIATED COMMENTS:
Yep, I recognized those pans right off, lol. That's what we use in our salad bar & sandwich station, lol. Hmm...wonder if Dave would notice a few of them missing ;o) BTW, I still need to get with you to get my very own Julie birdhouse! When I get back from Santa Fe next week I'll drop you a note!
Nice rig Sis!
:o) Thanks Scott!
Hey Vicki... I'm busy making lots of birdhouses for B&B so I have all sort of them on hand. Have fun in Santa Fe!
Have the kit and haven't used it yet. Thinking the same thing as ParrotiseBeads, we have those square containers at our bar & grill too. Thanks Julie for explaining this and posting pictures.
Karen.... my kit sat around for a good 6 months or so before I jumped in... when I did, I thought "what took me so long?", LOL. It's so easy... much simpler than you think, once you've done it the first time. I read through the info that came w/ my kit & Tink's thread on LE... bought her e-booklet (http://www.ebooktika.com/search?search_criteria=electroforming) which had all of the info that you could possibly need to get you started & then just jumped in. Super simple... so just do it! (& you're welcome)
Post a Comment
Thank you for commenting. I enjoy hearing from you!